What is a component in Angular
A component in Angular is a class with a template and a decorator. So in simple terms a component in Angular is composed of these 3 things
1- Open Visual Studio Code.
2- Open the Integrated Terminal from View Menu.
3- Create a new Project "ngDemo" with the Command Line "ng new [Project name]"
4- Run you Project with command line "ng serve".

5-Click on localhost:4200 url by pressing ctrl button. it'll open the browser and run your web application.


A component in Angular is a class with a template and a decorator. So in simple terms a component in Angular is composed of these 3 things
- Template - Defines the user interface. Contains the HTML, directives and bindings.
- Class - Contains the code required for template. Just like a class in any object oriented programming language like C# or Java, a class in angular can contain methods and properties. Properties contain the data that we want to display in the view template and methods contain the logic for the view. We use Typescript to create the class.
- Decorator - We use the Component decorator provided by Angular to add metadata to the class. A class becomes an Angular component, when it is decorated with the Component decorator.
1- Open Visual Studio Code.
2- Open the Integrated Terminal from View Menu.
3- Create a new Project "ngDemo" with the Command Line "ng new [Project name]"
4- Run you Project with command line "ng serve".

5-Click on localhost:4200 url by pressing ctrl button. it'll open the browser and run your web application.
6- Add a folder "Component" inside of src/app directory.

7- Now add a new Component inside Component folder.

https://github.com/angular/angular-cli/wiki/generate-component
8- It'll add two file in Component folder.
student-component.component.html
student-component.component.ts
9- Add a Model Class inside app directory.

10- Replace the Student-Component.component.ts file with the below code.

11- Replace the Student-Component.component.html file with the below code.

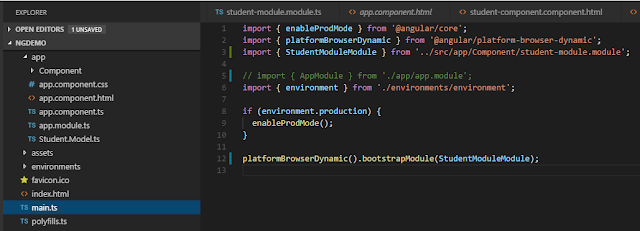
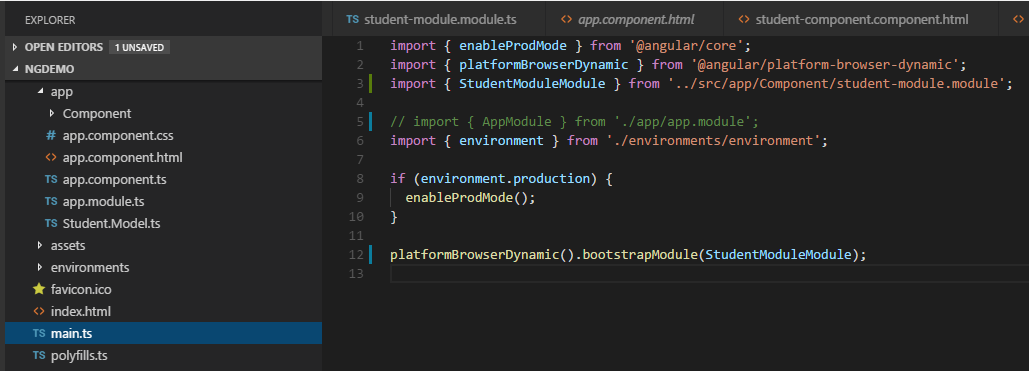
12- Create a new file inside Component folder with name student.module.ts and add the following code to it:

13- StudentComponent also needs to be updated at declaration and bootstrap level. We will also have to update main.ts with the newly added module. Below is the update main.ts.
14- Now we need to render this Component. for this we need to update our index.html. we use studen-form selecter that we used during Component creation.

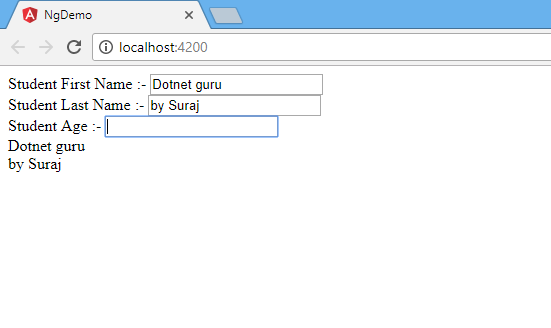
15- Now come to your browser.

16- Your Component is ready to use.
Reference: Click here
Thanks
Suraj K.

0 comments:
Post a Comment