Q: What is SSIS? How it is related with SQL Server.
SQL Server Integration Services (SSIS) is a component of SQL Server which can be used to perform a wide range of Data Migration and ETL operations. SSIS is a component in MSBI process of SQL Server.
This is a platform for Integration and Workflow applications. It is known for a fast and flexible OLTP and OLAP extensions used for data extraction, transformation, and loading (ETL). The tool may also be used to automate maintenance of SQL Server databases and multidimensional data sets.
Q: What is a workflow in SSIS 2014 ?
Workflow is a set of instructions on to specify the Program Executor on how to execute tasks and containers within SSIS Packages.
Q. What is a project and Package in SSIS?
Project is a container for developing packages. Package is nothing but an object. It implements the functionality of ETL — Extract, Transform and Load — data.
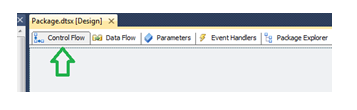
Q. What are the 4 elements (tabs) that you see on a default package designer in BIDS?
Control Flow, Data Flow, event Handler and package explorer. (Parameters – 2012 Data Tools)
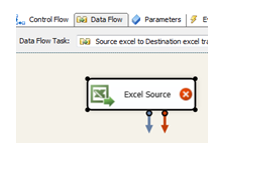
Q. What is a Control flow and Data Flow elements in SSIS?
Control Flow:
Control flow element is one that performs any function or provides structure or control the flow of the elements. There must be at least one control flow element in the SSIS package. In SSIS a workflow is called a control-flow. A control-flow links together our modular data-flows as a series of operations in order to achieve a desired result.
A control flow consists of one or more tasks and containers that execute when the package runs. To control order or define the conditions for running the next task or container in the package control flow
Data Flow:
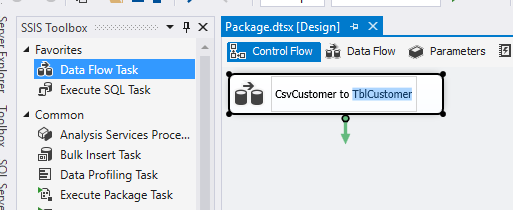
All ETL tasks related to data are done by data flow elements. It is not necessary to have a data flow element in the SSIS package. A data flow consists of the sources and destinations that extract and load data, the transformations that modify and extend data, and the paths that link sources, transformations, and destinations. Before you can add a data flow to a package, the package control flow must include a Data Flow task. The Data Flow task is the executable within the SSIS package that creates, orders, and runs the data flow. A separate instance of the data flow engine is opened for each Data Flow task in a package.
What are the 3 data flow components in SSIS?
Ans:
Source
Transformation
Destination
Q. What are connections and connection managers in SSIS?
Ans:
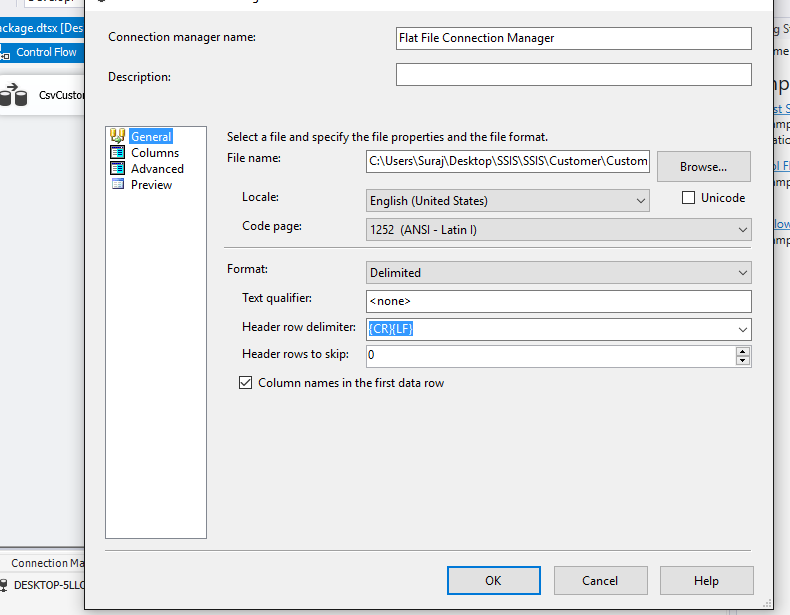
Connection as its name suggests is a component to connect to any source or destination from SSIS — like a sql server or flat file or lot of other options that SSIS provides. Connection manager is a logical representation of a connection.
12) Explain what is connection managers in SSIS?
While gathering data from different sources and writing it to a destination, connection managers are helpful. Connection manager facilitates the connection to the system that include information’s like data provider information, server name, authentication mechanism, database name, etc.
Q. What is the use of Check Points in SSIS?
SSIS provides a Checkpoint capability which allows a package to restart at the point of failure.
Q. Name Transformations available in SSIS?
DATACONVERSION: Converts columns data types from one to another type. It stands for Explicit Column Conversion.
DATAMININGQUERY: Used to perform data mining query against analysis services and manage Predictions Graphs and Controls.
DERIVEDCOLUMN: Create a new (computed) column from given expressions.
EXPORTCOLUMN: Used to export a Image specific column from the database to a flat file.
FUZZYGROUPING: Used for data cleansing by finding rows that are likely duplicates.
FUZZYLOOKUP: Used for Pattern Matching and Ranking based on fuzzy logic.
AGGREGATE: It applies aggregate functions to Record Sets to produce new output records from aggregated values.
AUDIT: Adds Package and Task level Metadata: such as Machine Name, Execution Instance, Package Name, Package ID, etc..
CHARACTERMAP: Performs SQL Server column level string operations such as changing data from lower case to upper case.
MULTICAST: Sends a copy of supplied Data Source onto multiple Destinations.
CONDITIONALSPLIT: Separates available input into separate output pipelines based on Boolean Expressions configured for each output.
COPYCOLUMN: Add a copy of column to the output we can later transform the copy keeping the original for auditing.
IMPORTCOLUMN: Reads image specific column from database onto a flat file.
LOOKUP: Performs the lookup (searching) of a given reference object set to a data source. It is used for exact matches only.
MERGE: Merges two sorted data sets into a single data set into a single data flow.
MERGEJOIN: Merges two data sets into a single dataset using a join junction.
ROWCOUNT: Stores the resulting row count from the data flow / transformation into a variable.
ROWSAMPLING: Captures sample data by using a row count of the total rows in dataflow specified by rows or percentage.
UNIONALL: Merge multiple data sets into a single dataset.
PIVOT: Used for Normalization of data sources to reduce anomalies by converting rows into columns
UNPIVOT: Used for de-normalizing the data structure by converts columns into rows in case of building Data Warehouses.
What is conditional split?
As the name suggest, this transformation splits the data based on condition and route them to different path. The logic for this transformation is based on CASE statement. The condition for this transformation is an expression. This transformation also provides us with default output, where rows matching no condition are routed. Conditional split is useful in scenarios like Telecom industry data you want to divide the customer data on gender, condition would be:
GENDER == ‘F’
SQL Server Integration Services (SSIS) is a component of SQL Server which can be used to perform a wide range of Data Migration and ETL operations. SSIS is a component in MSBI process of SQL Server.
This is a platform for Integration and Workflow applications. It is known for a fast and flexible OLTP and OLAP extensions used for data extraction, transformation, and loading (ETL). The tool may also be used to automate maintenance of SQL Server databases and multidimensional data sets.
Q: What is a workflow in SSIS 2014 ?
Workflow is a set of instructions on to specify the Program Executor on how to execute tasks and containers within SSIS Packages.
Q. What is a project and Package in SSIS?
Project is a container for developing packages. Package is nothing but an object. It implements the functionality of ETL — Extract, Transform and Load — data.
Q. What are the 4 elements (tabs) that you see on a default package designer in BIDS?
Control Flow, Data Flow, event Handler and package explorer. (Parameters – 2012 Data Tools)
Q. What is a Control flow and Data Flow elements in SSIS?
Control Flow:
Control flow element is one that performs any function or provides structure or control the flow of the elements. There must be at least one control flow element in the SSIS package. In SSIS a workflow is called a control-flow. A control-flow links together our modular data-flows as a series of operations in order to achieve a desired result.
A control flow consists of one or more tasks and containers that execute when the package runs. To control order or define the conditions for running the next task or container in the package control flow
Data Flow:
All ETL tasks related to data are done by data flow elements. It is not necessary to have a data flow element in the SSIS package. A data flow consists of the sources and destinations that extract and load data, the transformations that modify and extend data, and the paths that link sources, transformations, and destinations. Before you can add a data flow to a package, the package control flow must include a Data Flow task. The Data Flow task is the executable within the SSIS package that creates, orders, and runs the data flow. A separate instance of the data flow engine is opened for each Data Flow task in a package.
What are the 3 data flow components in SSIS?
Ans:
Source
Transformation
Destination
Q. What are connections and connection managers in SSIS?
Ans:
Connection as its name suggests is a component to connect to any source or destination from SSIS — like a sql server or flat file or lot of other options that SSIS provides. Connection manager is a logical representation of a connection.
12) Explain what is connection managers in SSIS?
While gathering data from different sources and writing it to a destination, connection managers are helpful. Connection manager facilitates the connection to the system that include information’s like data provider information, server name, authentication mechanism, database name, etc.
Q. What is the use of Check Points in SSIS?
SSIS provides a Checkpoint capability which allows a package to restart at the point of failure.
Q. Name Transformations available in SSIS?
DATACONVERSION: Converts columns data types from one to another type. It stands for Explicit Column Conversion.
DATAMININGQUERY: Used to perform data mining query against analysis services and manage Predictions Graphs and Controls.
DERIVEDCOLUMN: Create a new (computed) column from given expressions.
EXPORTCOLUMN: Used to export a Image specific column from the database to a flat file.
FUZZYGROUPING: Used for data cleansing by finding rows that are likely duplicates.
FUZZYLOOKUP: Used for Pattern Matching and Ranking based on fuzzy logic.
AGGREGATE: It applies aggregate functions to Record Sets to produce new output records from aggregated values.
AUDIT: Adds Package and Task level Metadata: such as Machine Name, Execution Instance, Package Name, Package ID, etc..
CHARACTERMAP: Performs SQL Server column level string operations such as changing data from lower case to upper case.
MULTICAST: Sends a copy of supplied Data Source onto multiple Destinations.
CONDITIONALSPLIT: Separates available input into separate output pipelines based on Boolean Expressions configured for each output.
COPYCOLUMN: Add a copy of column to the output we can later transform the copy keeping the original for auditing.
IMPORTCOLUMN: Reads image specific column from database onto a flat file.
LOOKUP: Performs the lookup (searching) of a given reference object set to a data source. It is used for exact matches only.
MERGE: Merges two sorted data sets into a single data set into a single data flow.
MERGEJOIN: Merges two data sets into a single dataset using a join junction.
ROWCOUNT: Stores the resulting row count from the data flow / transformation into a variable.
ROWSAMPLING: Captures sample data by using a row count of the total rows in dataflow specified by rows or percentage.
UNIONALL: Merge multiple data sets into a single dataset.
PIVOT: Used for Normalization of data sources to reduce anomalies by converting rows into columns
UNPIVOT: Used for de-normalizing the data structure by converts columns into rows in case of building Data Warehouses.
What is conditional split?
As the name suggest, this transformation splits the data based on condition and route them to different path. The logic for this transformation is based on CASE statement. The condition for this transformation is an expression. This transformation also provides us with default output, where rows matching no condition are routed. Conditional split is useful in scenarios like Telecom industry data you want to divide the customer data on gender, condition would be:
GENDER == ‘F’