Monday, 18 September 2017

ExpressJS - a basic demo

We have set up the development [click here], now it is time to start developing our first app using Express. Create a new file called index.js and type the following in it.


 1
 2
 3
 4
 5
 6
 7
 8
 9
10
11
12
var express = require('express');
var app = express();

app.get('/', function(req, res){
res.send("Hello world!");
});

var server = app.listen(5000, function () {  
var host = server.address().address;  
var port = server.address().port;  
console.log('App listening at http://%s:%s', host, port);  
});  

Save the file, go to your terminal and type the following.

nodemon index.js

This will start the server. To test this app, open your browser and go to http://localhost:5000 and a message will be displayed as in the following screenshot.

How the App Works?
The first line imports Express in our file, we have access to it through the variable Express. We use it to create an application and assign it to var app.

app.get(route, callback)
This function tells what to do when a get request at the given route is called. The callback function has 2 parameters, request(req) and response(res). The request object(req) represents the HTTP request and has properties for the request query string, parameters, body, HTTP headers, etc. Similarly, the response object represents the HTTP response that the Express app sends when it receives an HTTP request.

res.send()
This function takes an object as input and it sends this to the requesting client. Here we are sending the string "Hello World!".

app.listen(port, [host], [backlog], [callback]])
This function binds and listens for connections on the specified host and port. Port is the only required parameter here.

S.No.Argument & Description
1
port
A port number on which the server should accept incoming requests.
2
host
Name of the domain. You need to set it when you deploy your apps to the cloud.
3
backlog
The maximum number of queued pending connections. The default is 511.
4
callback
An asynchronous function that is called when the server starts listening for requests.

Continue Reading →

ExpressJS - Intro and Environment

Express.js is a web application framework for Node.js. It is a fast, robust and asynchronous in nature.
You can assume Express as a layer built on the top of the Node.js that helps manage a server and routes. It provides a robust set of features to develop web and mobile applications.
It is an open source framework. Express was developed by TJ Holowaychuk and is maintained by the Node.js foundation and numerous open source contributors.

ExpressJS - Environment

To start with, you should have the Node and the npm (node package manager) installed.
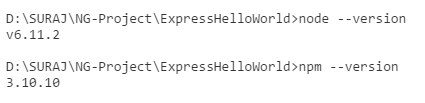
Confirm that node and npm are installed by running the following commands in your terminal.
node --version
npm --version
Now that we have Node and npm set up, let us understand what npm is and how to use it.

Node Package Manager(npm)
npm is the package manager for node. The npm Registry is a public collection of packages of open-source code for Node.js, front-end web apps, mobile apps, robots, routers, and countless other needs of the JavaScript community. npm allows us to access all these packages and install them locally. You can browse through the list of packages available on npm at npmJS.

How to use npm?
There are two ways to install a package using npm: globally and locally.

Globally − This method is generally used to install development tools and CLI based packages. To install a package globally, use the following code.
npm install -g <package-name>
Locally − This method is generally used to install frameworks and libraries. A locally installed package can be used only within the directory it is installed. To install a package locally, use the same command as above without the -g flag.
npm install <package-name>

Whenever we create a project using npm, we need to provide a package.json file, which has all the details about our project. npm makes it easy for us to set up this file. Let us set up our development project.

Step 1 − Start your terminal/cmd, create a new folder named ExpressHelloWorld and cd (create directory) into it −

Step 2 − Now to create the package.json file using npm, use the following code.
npm init
It will ask you for the following information.

Just keep pressing enter, and enter your name at the “author name” field.

Step 3 − Now we have our package.json file set up, we will further install Express. To install Express and add it to our package.json file, use the following command −
npm install --save express
Tip − The --save flag can be replaced by the -S flag. This flag ensures that Express is added as a dependency to our package.json file. This has an advantage, the next time we need to install all the dependencies of our project we can just run the command npm install and it will find the dependencies in this file and install them for us.

This is all we need to start development using the Express framework. To make our development process a lot easier, we will install a tool from npm, nodemon. This tool restarts our server as soon as we make a change in any of our files, otherwise we need to restart the server manually after each file modification. To install nodemon, use the following command −
npm install -g nodemon
You can now start working on Express.


Continue Reading →

Friday, 15 September 2017

Services - Angular

An Angular service is simply a javascript function, along with its associated properties and methods, that can be included (via dependency injection) into Angular components. They allow you to develop code for specific tasks that can be used in those components.

Instead of copying and pasting the same code over and over, you'll create a single reusable data service and inject it into the components that need it. Using a separate service keeps components lean and focused on supporting the view, and makes it easy to unit-test components with a mock service.

In this tutorials, I am going to create services for adding and getting citylist.

1- Use the Project that you have created before for Inheritance - Angular 2.
2- Add a new folder named "Service" in src/app directory.
3- Change the directory and Create Service from terminal.
       cd src\app\Service  <Enter>
       ng g s City <Enter>

See the below image:

the above command will create a city.service.ts file and a spec file. ignore the spec file for now.

4- Add the function for adding and getting city list in service. Look the below code.

city.service.ts
import { Injectable } from '@angular/core';

@Injectable()
export class CityService {

cityList: string[] = [];
constructor() { }

AddCity(city: string) {
this.cityList.push(city);
}

GetCities(): string[] {
return this.cityList;
}
}

5- Now, Your Service is ready to use. Create a Component to use Service functions. in the app directory create a folder "ServiceComponent" and change the directory in terminal.

                          cd..<Enter>
                          cd src\app\ServiceComponent <Enter>
                          ng g c City -is --flat --spec false <Enter>

 The above command will create a CityComponent.

Importing the Service to your Components
You can either import your service directly within the components, or you can import them to the app.module.ts file, which will give all of your components access to that service. We'll show you both ways.

Import the Service to your Component

Choose a component file (CityComponent) and at the top, you must include the service member
(line 2 below):

import { Component, OnInit } from '@angular/core';
import {CityService} from '../Service/city.service'

Add it as a Provider

Now you must add it to the providers array in the Component decorator metadata (line 5 below):

@Component({
selector: 'app-city',
templateUrl: './city.component.html',
styles: [],
providers:[CityService]
})

Include it through depedency injection

In the constructor arguments of the component class, we include it through dependency injection:

constructor(private cityService: CityService) {
}

Using the Service

Now we can access the service's methods and properties by referencing the private cityService.
For example:

ngOnInit() {
this.cityList = this.cityService.GetCities();
}

AddCity() {
this.cityService.AddCity(this.city);
}

Here's the full code of the component above.

City.Component.ts
import { Component, OnInit } from '@angular/core';
import { CityService } from '../Service/city.service';

@Component({
selector: 'app-city',
templateUrl: './city.component.html',
styles: [],
providers:[CityService]
})
export class CityComponent implements OnInit {
city: string;
cityList: string[];
constructor(private cityService: CityService) {
}

ngOnInit() {
this.cityList = this.cityService.GetCities();
}
AddCity() {
this.cityService.AddCity(this.city);
}
}

City.Component.html
<h3>City Component</h3>
<input type="text" [(ngModel)]="city" /><button type="button" (click)="AddCity()">Add</button>

<h4>City List</h4>
<ul>
<li *ngFor="let item of cityList">{{item}}</li>
</ul>

One more change you need to do is, you have to import FormModule in your appModule.ts file.

import{FormsModule} from '@angular/forms';

Set the FormsModule in @NGModule Decorator.

imports: [
BrowserModule, FormsModule
],

Now your Service and Component is ready to use.

Including the Service in app.module.ts

The only step that differs when including a service in the app.module.ts from including it in a specific component is that you're declaring the service in the providers property of the app.module.ts @NgModule metadata, as opposed to the @Component's meta data:

In app.module.ts:
import{FormsModule} from '@angular/forms';
import { CityComponent } from './ServiceComponent/city.component';
import { CityService } from './Service/city.service';

@NgModule({
declarations: [
AppComponent,
CityComponent
],
imports: [
FormsModule
],
providers: [CityService],
bootstrap: [CityComponent]
})
export class AppModule { }

Now all Components within our application will have access to CityService. We no longer need to include CityService in a providers array within the component's metadata.  We do still need to import the CityService at the top of the components that we wish to use.

To register a service with the root injector we use providers property of @ngModule decorator and to register a service with the injector at a component levet use providers property of @Component decorator.

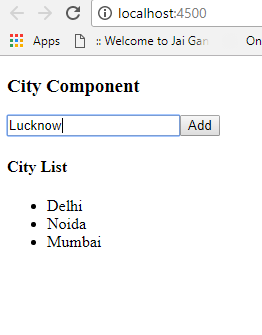
Bootstrap the component and run your application. Seet the output.


Continue Reading →

Thursday, 14 September 2017

LIFECYCLE HOOKS - ANGULAR2

Let’s see about lifecycle hooks in Angular2.
There are eight main hooks for every component to have robustness in our built applications.


Here is the complete lifecycle hook interface inventory:

ngOnChanges - called when an input binding value changes
ngOnInit - after the first ngOnChanges
ngDoCheck - after every run of change detection
ngAfterContentInit - after component content initialized
ngAfterContentChecked - after every check of component content
ngAfterViewInit - after component's view(s) are initialized
ngAfterViewChecked - after every check of a component's view(s)
ngOnDestroy - just before the component is destroyed

A component has a lifecycle managed by Angular.
Angular creates it, renders it, creates and renders its children, checks it when its data-bound properties change, and destroys it before removing it from the DOM.

Angular offers lifecycle hooks that provide visibility into these key life moments and the ability to act when they occur.

Constructor:
This won’t be taken as lifecycle hooks but this will instantiate all component hooks and it is run first when the component is activated.

>app.ts file:
class MyComponent {
constructor( ) {
/*all other modules injection and dependency injection and initialization will go here*/
console.log(“This is Constructor”); // printed first in console
}
}

ngOnChanges:
This hook will be run when our component is setting or resetting the values for input properties.This will be called before ngOnInit hook whenever the changes in the input property made in a component.
This will be used to render the DOM and updating the DOM for each and every changes made in the component attributes.
This may run multiple times in the lifetime of the each component

>app.ts file:
class MyComponent {
ngOnChanges( ) {
/*Called when the changes made in the input properties of the component before it binds to view*/
console.log(“This is ngOnChange”); // printed second in console
}
}

ngOnInit:
The Initialization of the component or directive of our app will be made in this hook after the angular displays the initial value of input properties.
When changes made in input properties of the component this hook will be called after the ngOnChanges.
This hook will run only one time after initializing all the properties of the component

>app.ts file:
class MyComponent {
ngOnInit( ) {
/*the Initialization of every input properties and functionalities will go here*/
console.log(“This is ngOnInit”); // printed third in console
}
}

ngDoCheck:
This will be called immediately after ngOnInit, And called on every change made in component properties, So the operations that have to be done on the change of any input properties can be written in this hook.
This will be executed for every change detection in cycles even there is no properties changed.

>app.ts file:
class MyComponent {
ngDoCheck( ) {
/*The functionalities to be done for every change made in input properties will go here*/
console.log(“This is ngDoCheck”); //printed whenever the changes made
}
}

ngAfterContentInit:
This will be called after the angular updates the component’s view values this will be called after ngDoCheck hook.
This hook can be written only for component of angular application
If the content is inserted in the component this will be called.

>app.ts file:
class MyComponent {
ngAfterContentInit( ) {
/*The functionalities to be done when initialization of the whole content in the component will go here*/
console.log(“This is ngAfterContentInit”); /*printed when the whole content is initialized*/
}
}

ngAfterContentChecked:
This hook will be called after the angular checked the content has been projected into the component. This will be called after ngAfterContentInit and every call of ngDoCheck hook of the component
This hook also can be written only for component of angular application
The component this will be called when the content which is inserted has been changed.

>app.ts file:
class MyComponent {
ngAfterContentChecked( ) {
/*The functionalities to be done when changes present in the component will go here*/
console.log(“This is ngAfterContentChecked”); /*printed when the content is checked and changes present*/
}
}

ngAfterViewInit:
Called when the angular checks the view of the component and child views of the components.
It will check all the HTML view has been initialized.

>app.ts file:
class MyComponent {
ngAfterViewInit( ) {
/*The functionalities to be done when initialization of the whole content has been projected into view will go here*/
console.log(“This is ngAfterViewInit”); /*printed when the whole content is projected in view and runs only once*/
}}

ngAfterViewChecked:
Initially this hook will be called after the ngAfterContentChecked hook and after every call of ngAfterViewInit and subsequent of ngAfterContentChecked.
It will check all initialized view or child view had any changes

>app.ts file:
class MyComponent {
ngAfterViewChecked( ) {
/*The functionalities to be done when changes present in the component and they are projected in view will go here*/
console.log(“This is ngAfterViewChecked”); /*printed when the content is checked and changes present are projected in view*/
}}

ngDestroy:
This hook will be called only when the component is removed from the view of the angular component, So the deallocation of memory and removing the intervals, timeout variables will be done in this hook.

>app.ts file:
class MyComponent {
ngDestory ( ) {
/*The functionalities to be done when the component is unmounted from the app will go here*/
console.log(“This is ngDestory”); /*printed in after the component is unmounted*/
}}

Continue Reading →

Inheritance - Angular 2

One of the exciting new feature is component inheritance. Component inheritance is very powerful and it can increase your code reusability.

What does component inheritance provide us?
Component Inheritance in Angular covers all of the following:

Metadata (decorators): metadata (e.g. @Input(), @Output), etc. defined in a derived class will override any previous metadata in the inheritance chain otherwise the base class metadata will be used.

Constructor: the base class constructor will be used if the derived class doesn’t have one, this mean that all the services you injected in parent constructor will be inherited to child component as well.

Lifecycle hooks: parent lifecycle hooks (e.g. ngOnInit, ngOnChanges) will be called even when are not defined in the derived class.

Component inheritance DO NOT cover templates and styles. Any shared DOM or behaviours must be handled separately.

Building with Component Inheritance
Let's start with a simple code. Here I will access the data from parent component to child component.

Use the Project that you have created before for Custom Directive.

1- Add a new folder named "Inheritance" in src/app directory.
2- Add two component, one is parent and other is child.

cd src\app\Inheritance
ng g c parent -is --flat --spec false
ng g c child -is --flat --spec false


3- Add a variable and a function in parent component.
import { ComponentOnInit } from '@angular/core';

@Component({
  selector: 'app-parent',
  templateUrl: './parent.component.html',
  styles: []
})
export class ParentComponent  {
protected companystring;
  constructor() { this.company="Dotnet guru";}

 public getHello()
 {
    alert("Hello Guru");
 }
}

4- Now extend the parent component in child component.
The super keyword can be used in child to reference parent class properties and the parent  class constructor.
import { ComponentOnInit } from '@angular/core';
import{ParentComponentfrom './parent.component';

@Component({
  selector: 'app-child',
  templateUrl: './child.component.html',
  styles: []
})
export class ChildComponent extends ParentComponent {
  constructor() { super();}
}

5- Now you can access the parent component data in child component. see the code below in child.component.html
<p>
{{company}}
</p>

<button type="button" class="btn btn-lg btn-default" (click)="getHello()">button
</button>

6- To run the page, bootstrap the ChildComponent in app.Module.ts file.

7- Add the selector of ChildComponent in index.html file.
<app-child></app-child>

8- Now save your Project and run from integrated terminal.
       ng serve <Enter>


Continue Reading →

Wednesday, 13 September 2017

Custom Directive - Angular 2

Building directives in Angular 2+ is not much different than building components. After all, components are just directives with a view attached. In fact, there are three kinds of directives in Angular: components, attribute directives and structural directives. https://dzone.com/

Types of Directives
Angular 2 categorizes directives into 3 parts:
  1. Directives with templates known as Components
  2. Directives that creates and destroys DOM elements known as Structural Directives
  3. Directives that manipulate DOM by changing behavior and appearance known as Attribute Directives
In this project I'm creating a directive that highlight any element with yellow colour on hover event.

Create Directive Folder inside src/app/ folder.
Add a custom directive inside Directive  folder

       cd Directive <Enter>
       ng g d highlight --spec false <Enter>


 It'll add a highlight.directive.ts file.
Open the file and replace the following code.

import { DirectiveHostListenerElementRef } from '@angular/core';

@Directive({
  selector: '[Highlight], .Highlight'
})
export class HighlightDirective {

  constructor(private elElementRef) { }
  
  @HostListener('mouseover'onmouseover() {
    this.el.nativeElement.style.backgroundColor = 'yellow';
  }
  @HostListener('mouseleave'onmouseleave() {
    this.el.nativeElement.style.backgroundColor = null;
  }
 }

HostListener: Decorator that declares a DOM event to listen for, and provides a handler method to run when that event occurs.

Now add a Component, in which you will use the above Highlight directive.

          ng g c Directory -is --flat --spec false <Enter>
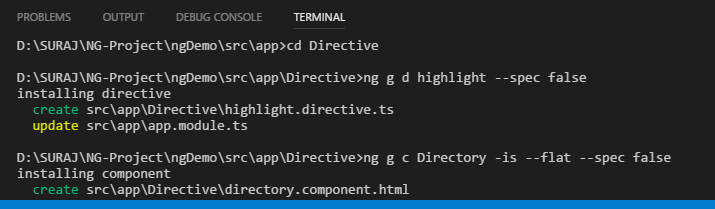
[You can also see the command in the above image]

It'll add two file
    directory.component.ts
    directory.component.html

In directory.component.ts file you dont need to write anything. open the directory.component.html file. and add the below code.

<h2 class="Highlight">Custom DirectiveClass Based</h2>
<h2 Highlight>Custom DirectiveAttribute Based</h2>

Now you are done with the code for Custom Directive.
To run the page, bootstrap the DirectoryComponent in app.Module.ts file.

import { BrowserModule } from '@angular/platform-browser';
import { NgModule } from '@angular/core';

import { AppComponent } from './app.component';
import { HighlightDirective } from './Directive/highlight.directive';
import { DirectoryComponent } from './Directive/directory.component';

@NgModule({
  declarations: [
    AppComponent,
    HighlightDirective,
    DirectoryComponent
  ],
  imports: [
    BrowserModule
  ],
  providers: [],
  bootstrap: [DirectoryComponent]
})
export class AppModule { }


Add the selector of directive component in index.html file.
<!doctype html>
<html lang="en">
<head>
  <meta charset="utf-8">
  <title>NgDemo</title>
  <base href="/">

  <meta name="viewport" content="width=device-width, initial-scale=1">
  <link rel="icon" type="image/x-icon" href="favicon.ico">
</head>
<body>
  <!-- <app-root></app-root> -->
<app-directory></app-directory>
</body>
</html>


Now save your Project and run from integrated terminal.
ng serve <Enter>

See the Output. when you hover the mouse on h2 element it'll highlight in yellow colour.

Thanks and Regards
Suraj K. Mad.

Continue Reading →

Nested Component - Angular 2

In this article, we quickly look into how to build Nested Angular component to use HTML control and bind it to model. In this article I'm going to use the same code that I have created for Component- AngularJS2

In this article, we will move label which was getting rendered at the bottom of student-form component to nested component. 

So, we have Student-Component for now. In which We have some input fields and Details section below.


Now we'll move details section in Child Component. for this we will add a new component in Component Directory.


It'll add two file in Component folder. 
             student-detail.component.html
             student-detail.component.ts

Open the student-detail.component.ts file and write the following code.

import { ComponentOnInitInputOutputEventEmitter } from '@angular/core';

@Component({
  selector: 'app-student-detail',
  templateUrl: './student-detail.component.html',
  styles: []
})
export class StudentDetailComponent implements OnInit {
  @Input() FirstName:String
  @Input() LastName:String
  @Input() Age:number;
 
  constructor() { }

  ngOnInit() {
  }
}

In this component, we will be passing data from parent control to be rendered. To achieve this, we will also import Input from angular/core. We have defined selector and templateUrl at line 4 & 5. To map parent input with Student-Detail component, we have defined @input() and defined FirstName, LastName & Age at line 9, 10 & 11. 

We can also have variable name and attribute name different. To have different attribute name, name needs to be defined inside bracket for example @Input('first-name')

 @Input('first-name') FirstName:String; 
 @Input('last-name') LastName:String; 

Similarly, we can also evolve methods from parent control using Output. To achieve this we will have to inject Output & EventEmitter dependency and then add a method to evoke parent method.

import { ComponentOnInitInputOutputEventEmitter } from '@angular/core';

@Component({
  selector: 'app-student-detail',
  templateUrl: './student-detail.component.html',
  styles: []
})
export class StudentDetailComponent implements OnInit {
  @Input('first-name'FirstName:String
  @Input('last-name'LastName:String
  @Input() Age:number;
  @Output('onButtonClick'buttonClick = new EventEmitter();
  
     onCLick(){
       this.buttonClick.emit();
     }
  constructor() { }

  ngOnInit() {
  }
}

Now open the student-detail.component.html file and replace the below code.

<section>
  <br/>
  <div>Student Details are ...</div>
  <div>
    First Name : {{FirstName}} <br/>
    Last Name : {{LastName}} <br/>
    Age : {{Age}}
  </div>
  <button (click)="onCLick()">Click Me</button>
  <br/>
  <ng-content></ng-content>
</section>

In the HTML template we just added, we are referring to variable defined in student-detail.component.ts at line 5,6 & 7. I have highlighted this variable name in the above HTML template. At line 7, we have mapped onClick method which will internally evoke parent control method mapped to it.

In the HTML template, we have also added ng-content tag .  This tag will be rendering content we place between app-student-detail tag. We will discuss this more when we add app-student-detail tag in our main component student-form. Let's start injecting our new created component in student-form. Here is the updated template with app-student-detail tag.

<div>
  Student First Name :- <input [(ngModel)] = "Student.FirstName" type="text"><br/>
  Student Last Name :- <input [(ngModel)] = "Student.LastName" type="text"><br/>
  Student Age :- <input [(ngModel)] = "Student.Age"  type="text"><br/>

  <app-student-detail first-name="{{Student.FirstName}}" last-name="{{Student.LastName}}" 
       Age="{{Student.Age}}" (onButtonClick)="onButtonClick()">
          <div>This is inside nested control</div>
  </app-student-detail>
</div>

At line 5 & 6, we have added tag app-student-detail attributes, FirstName LastName & Age with respective parent variable mapping. onButtonClick() method is mapped to child control. We have used the curly bracket for mapping variable but the same can also be achieved using square bracket as mentioned below:

<app-student-detail [first-name]="Student.FirstName" [last-name]="Student.LastName" [Age]="Student.Age" (onButtonClick)="onButtonClick()">
<div>This is inside nested control</div>
</app-student-detail>

Now we need to add onButtonClick method to student-component.component.ts. 

import { ComponentOnInit } from '@angular/core';
import { StudentModel } from '../Student.Model'

@Component({
  selector: 'student-form',
  templateUrl: './student-component.component.html',
  styles: []
})
export class StudentComponentComponent implements OnInit {
  constructor() { }
  ngOnInit() {
  }

  Student : StudentModel = new StudentModel();

  onButtonClick = function(){
    alert('Hey, button was clicked in child component');
  }
}

If you have noticed div tag between app-student-detail tag, the same will be passed to app-student-detail component and will be rendered inside ng-content tag which we have added inside student-detail component. 

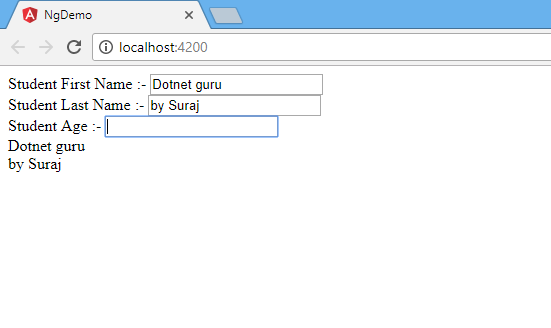
Now run the application using ng serve command in terminal. You should now see final output in your default browser. If you type inside textbox, the same should get displayed inside nested component.

You can now see final output in your default browser. If you type inside textbox, the same should get displayed inside nested component.

In this article, we created a nested component which takes data from parent component and then renders it. We did also look into the couple of ways we can map data with child control.

Continue Reading →

Topics

ADFS (1) ADO .Net (1) Ajax (1) Angular (47) Angular Js (15) ASP .Net (14) Authentication (4) Azure (3) Breeze.js (1) C# (55) CD (1) CI (2) CloudComputing (2) Coding (10) CQRS (1) CSS (2) Design_Pattern (7) DevOps (4) DI (3) Dotnet (10) DotnetCore (20) Entity Framework (5) ExpressJS (4) Html (4) IIS (1) Javascript (17) Jquery (8) jwtToken (4) Lamda (3) Linq (10) microservice (4) Mongodb (1) MVC (46) NodeJS (8) React (10) SDLC (1) Sql Server (32) SSIS (3) SSO (1) TypeScript (3) UI (1) UnitTest (2) WCF (14) Web Api (16) Web Service (1) XMl (1)

Dotnet Guru Archives