Wednesday, 21 November 2018

WCF Service as Windows Service

Host a WCF Service in a Managed Windows Service

This topic outlines the basic steps required to create a Windows Communication Foundation (WCF) service that is hosted by a Windows Service. The scenario is enabled by the managed Windows service hosting option that is a long-running WCF service hosted outside of Internet Information Services (IIS) in a secure environment that is not message activated. 

The service code includes a service implementation of the service contract, a Windows Service class, and an installer class. The service implementation class, CalculatorService, is a WCF service. The CalculatorWindowsService is a Windows service. To qualify as a Windows service, the class inherits from ServiceBase and implements the OnStartand OnStop methods. In OnStart, a ServiceHost is created for the CalculatorService type and opened. In OnStop, the service is stopped and disposed. The host is also responsible for providing a base address to the service host, which has been configured in application settings. The installer class, which inherits from Installer, allows the program to be installed as a Windows service by the Installutil.exe tool.

Construct the service and provide the hosting code
  1. Create a new Visual Studio Console app project called WcfAsWindows.
  2. Rename Program.cs to Service.cs.
  3. Change the namespace to Microsoft.ServiceModel.Samples.
  4. Add references to the following assemblies:
    • System.ServiceModel.dll
    • System.ServiceProcess.dll
    • System.Configuration.Install.dll
Add the following using statements to Service.cs.

using System.ComponentModel; using System.ServiceModel; using System.ServiceProcess; using System.Configuration; using System.Configuration.Install;

Define the ICalculator service contract as shown in the following code.

// Define a service contract.
[ServiceContract(Namespace = "http://Microsoft.ServiceModel.Samples")]
public interface ICalculator
{
    [OperationContract]
    double Add(double n1double n2);
    [OperationContract]
    double Subtract(double n1double n2);
    [OperationContract]
    double Multiply(double n1double n2);
    [OperationContract]
    double Divide(double n1double n2);
}

Implement the service contract in a class called CalculatorService as shown in the following code.

// Implement the ICalculator service contract in a service class.
public class CalculatorService : ICalculator
{
    // Implement the ICalculator methods.
    public double Add(double n1double n2)
    {
        double result = n1 + n2;
        return result;
    }

    public double Subtract(double n1double n2)
    {
        double result = n1 - n2;
        return result;
    }

    public double Multiply(double n1double n2)
    {
        double result = n1 * n2;
        return result;
    }

    public double Divide(double n1double n2)
    {
        double result = n1 / n2;
        return result;
    }
}

Create a new class called CalculatorWindowsService that inherits from the ServiceBase class. Add a local variable called serviceHost to reference the ServiceHost instance. Define the Main method that calls 

ServiceBase.Run(new CalculatorWindowsService)

public class CalculatorWindowsService : ServiceBase
{
    public ServiceHost serviceHost = null;
    public CalculatorWindowsService()
    {
        // Name the Windows Service
        ServiceName = "WCFWindowsServiceSample";
    }

    public static void Main()
    {
        ServiceBase.Run(new CalculatorWindowsService());
    }
 }

Override the OnStart(String[]) method by creating and opening a new ServiceHost instance as shown in the following code.

// Start the Windows service.
protected override void OnStart(string[] args)
{
    if (serviceHost != null)
    {
        serviceHost.Close();
    }

    // Create a ServiceHost for the CalculatorService type and 
    // provide the base address.
    serviceHost = new ServiceHost(typeof(CalculatorService));

    // Open the ServiceHostBase to create listeners and start 
    // listening for messages.
    serviceHost.Open();
}

Override the OnStop method closing the ServiceHost as shown in the following code.

protected override void OnStop()
{
    if (serviceHost != null)
    {
        serviceHost.Close();
        serviceHost = null;
    }
}

Create a new class called ProjectInstaller that inherits from Installer and that is marked with the RunInstallerAttribute set to true. This allows the Windows service to be installed by the Installutil.exe tool.

// Provide the ProjectInstaller class which allows 
// the service to be installed by the Installutil.exe tool
[RunInstaller(true)]
public class ProjectInstaller : Installer
{
    private ServiceProcessInstaller process;
    private ServiceInstaller service;

    public ProjectInstaller()
    {
        process = new ServiceProcessInstaller();
        process.Account = ServiceAccount.LocalSystem;
        service = new ServiceInstaller();
        service.ServiceName = "WCFWindowsServiceSample";
        Installers.Add(process);
        Installers.Add(service);
    }
}

Remove the Service class that was generated when you created the project.

Add an application configuration file to the project. Replace the contents of the file with the following configuration XML.

<?xml version="1.0" encoding="utf-8" ?>
<configuration>
  <system.serviceModel>    <services>
      <!-- This section is optional with the new configuration model
           introduced in .NET Framework 4. -->
      <service name="Microsoft.ServiceModel.Samples.CalculatorService"
               behaviorConfiguration="CalculatorServiceBehavior">
        <host>
          <baseAddresses>
            <add baseAddress="http://localhost:8000/ServiceModelSamples/service"/>
          </baseAddresses>
        </host>
        <!-- this endpoint is exposed at the base address provided by hosthttp://localhost:8000/ServiceModelSamples/service  -->
        <endpoint address=""
                  binding="wsHttpBinding"
                  contract="Microsoft.ServiceModel.Samples.ICalculator" />
        <!-- the mex endpoint is exposed at http://localhost:8000/ServiceModelSamples/service/mex -->
        <endpoint address="mex"
                  binding="mexHttpBinding"
                  contract="IMetadataExchange" />
      </service>
    </services>
    <behaviors>
      <serviceBehaviors>
        <behavior name="CalculatorServiceBehavior">
          <serviceMetadata httpGetEnabled="true"/>
          <serviceDebug includeExceptionDetailInFaults="False"/>
        </behavior>
      </serviceBehaviors>
    </behaviors>
  </system.serviceModel>
</configuration>

Right click the App.config file in the Solution Explorer and select Properties. Under Copy to Output Directoryselect Copy if Newer.

This example explicitly specifies endpoints in the configuration file. If you do not add any endpoints to the service, the runtime adds default endpoints for you. In this example, because the service has a ServiceMetadataBehavior set to true, your service also has publishing metadata enabled. For more information about default endpoints, bindings, and behaviors, see Simplified Configuration and Simplified Configuration for WCF Services.

Install and run the service

Build the solution to create the WcfAsWindows.exe executable.

Open Developer Command Prompt (Administration mode) for Visual Studio and navigate to the project directory. Type installutil bin\WcfAsWindows.exe at the command prompt to install the Windows service.


Type services.msc at the command prompt to access the Service Control Manager (SCM). The Windows service should appear in Services as "WCFWindowsServiceSample". The WCF service can only respond to clients if the Windows service is running. To start the service, right-click it in the SCM and select "Start", or type net start WCFWindowsServiceSample at the command prompt.
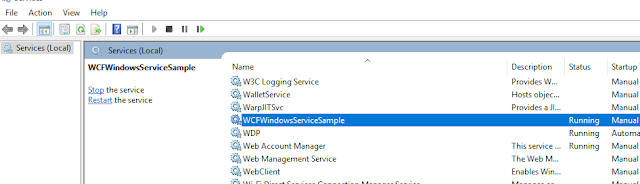
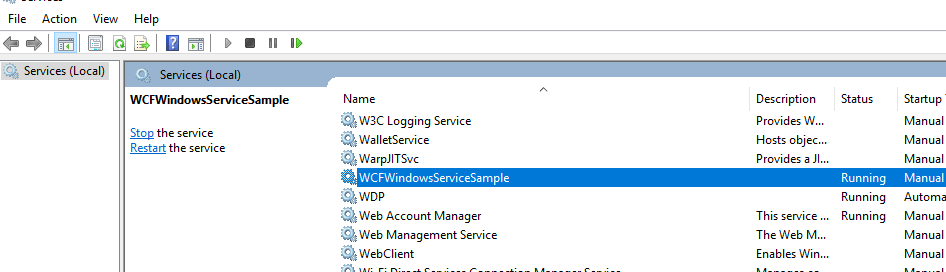

If you make changes to the service, you must first stop it and uninstall it. 
To uninstall the Windows service type installutil /u bin\service.exe at the command prompt.

Download the complete project click here


Continue Reading →

Monday, 19 November 2018

Custom Routes for MVC Application

When you request any page into MVC Application, it will go through the Routing Architecture. Your Routing system will decide your URL pattern. The default routing algorithm is like {controller}/ {action}/ {id} patterns. But it can be possible to change that pattern using Custom Routes.

Default Route
You can configure Route into the Global.aspx's Application Start Event. When you are creating an MVC application, it will already define Default route. Default route can be configured using the following code:

     routes.MapRoute(
      name: "Default",
      url: "{controller}/{action}/{id}",
      defaults: new { controller = "Home", action = "Index", id = UrlParameter.Optional });


Custom Routes
It is possible to develop an MVC application without creating a Custom Route. But sometimes, there is a situation to change the pattern of URL in which it makes sense to create Custom Routes.

Examples of Valid Route Patterns in ASP.NET MVC

Route PatternURL Example
mysite/{username}/{action}~/mysite/jatten/login
public/blog/{controller}-{action}/{postId}~/public/blog/posts-show/123
{country}-{lang}/{controller}/{action}/{id}~/us-en/products/show/123
products/buy/{productId}-{productName}~/products/but/2145-widgets

Suppose I have a BlogController like below.

public class BlogController : Controller
    {
        public string Archive(DateTime? entryDate)
        {
            return "You wants Blog Entry on Date:=" + entryDate.ToString();
        }

        public string All()
        {
            return "All function";
        }

        public string getData(string name, int empId)
        {
            return "name: " + name + " id= " + empId;
        }
     }

1- Imagine that you want to route a request look like: /Archive/12-25-2010.

          routes.MapRoute(
                            "myBlogRoute1",
                            "{Archive}/{entrydate}",

                            new { Controller = "Blog", action = "Archive", });

2- Imagine that you want to route a request look like: /MyBlogs/All/12 or /MyBlogs/All/

            // MyBlogs/All/12  
            // MyBlogs/All/
            routes.MapRoute(
                   name: "myBlogRoute2",
                   url: "MyBlogs/{action}/{id}",
                   defaults: new
                   {
                       controller = "Blog",
                       action = "All",
                       id = UrlParameter.Optional
                   }

                 );

3- Imagine that you want to route a request look like: /MyBlogs/Suraj/Post/101

            // MyBlogs/suraj/Post/101
            routes.MapRoute(
                name: "myBlogRoute3",
                url: "MyBlogs/{name}/Post/{postId}",
                defaults: new
                {
                    controller = "Blog",
                    action = "getData",
                }

            );

https://www.tutorialsteacher.com/
Continue Reading →

Thursday, 15 November 2018

Exception Handling in Web API

Exception Handling in ASP.NET Web API
There are many ways to handle the exception.
  1. HttpResponseException
  2. Exception Filters
  3. HttpError
HttpResponseException: This exception class allows us to return HttpResponseMessage to the client. It returns HTTP status code that is specified in the exception Constructor.

public Product GetProduct(int id) {
    Product item = repository.Get(id);
    if (item == null)
    {
        throw new HttpResponseException(HttpStatusCode.NotFound);
    }
    return item;
}

Exception Filters: You can customize how Web API handles exceptions by writing an exception filter. An exception filter is executed when a controller method throws any unhandled exception that is not an HttpResponseException exception. The HttpResponseException type is a special case, because it is designed specifically for returning an HTTP response. Exception filters implement the System.Web.Http.Filters.IExceptionFilter interface.
The simplest way to write an exception filter is to derive from the System.Web.Http.Filters.ExceptionFilterAttribute class and override the OnException method.

public class NotImplExceptionFilterAttribute : ExceptionFilterAttribute 
    {
        public override void OnException(HttpActionExecutedContext context)
        {
          if (context.Exception is NotImplementedException)
          {
            context.Response = new HttpResponseMessage(HttpStatusCode.NotImplemented);
          }
        }
    }

Register Exception Filters

There are many ways to register exception filter but the developers generally follow three approaches to register filter.
  1. Decorate Action with exception filter.
  2. Decorate Controller with exception filter.
  3. Filter Register globally.
To apply the filter to a specific action, add the filter as an attribute to the action:

public class ProductsController : ApiController
{
    [NotImplExceptionFilter]
    public Contact GetContact(int id)
    {
        throw new NotImplementedException("This method is not implemented");
    }
}


To apply the filter to all of the actions on a controller, add the filter as an attribute to the controller class:

[NotImplExceptionFilter]
public class ProductsController : ApiController
{
    // ...
}

To apply the filter globally to all Web API controllers, add an instance of the filter to the GlobalConfiguration.Configuration.Filters collection. Exeption filters in this collection apply to any Web API controller action.

public static class WebApiConfig
{
    public static void Register(HttpConfiguration config)
    {
        config.Filters.Add(new ProductStore.NotImplExceptionFilterAttribute());

        // Other configuration code...
    }
}

HttpError: CreateErrorResponse method of Request object helps us to return meaningful error code and message to the client.

public HttpResponseMessage GetProduct(int id) {
    Product item = repository.Get(id);
    if (item == null)
    {
        var message = string.Format("Product with id = {0} not found"id);
        return Request.CreateErrorResponse(HttpStatusCode.NotFoundmessage);
    }
    else
    {
        return Request.CreateResponse(HttpStatusCode.OKitem);
    }
}
Continue Reading →

Wednesday, 31 October 2018

RXJS Operators

Operators By Category

1- Creating Observables

Operators that originate new Observables.
  • Create — create an Observable from scratch by calling observer methods programmatically
  • Defer — do not create the Observable until the observer subscribes, and create a fresh Observable for each observer
  • Empty/Never/Throw — create Observables that have very precise and limited behavior
  • From — convert some other object or data structure into an Observable
  • Interval — create an Observable that emits a sequence of integers spaced by a particular time interval
  • Just — convert an object or a set of objects into an Observable that emits that or those objects
  • Range — create an Observable that emits a range of sequential integers
  • Repeat — create an Observable that emits a particular item or sequence of items repeatedly
  • Start — create an Observable that emits the return value of a function
  • Timer — create an Observable that emits a single item after a given delay

2- Transforming Observables

Operators that transform items that are emitted by an Observable.
  • Buffer — periodically gather items from an Observable into bundles and emit these bundles rather than emitting the items one at a time
  • FlatMap — transform the items emitted by an Observable into Observables, then flatten the emissions from those into a single Observable
  • GroupBy — divide an Observable into a set of Observables that each emit a different group of items from the original Observable, organized by key
  • Map — transform the items emitted by an Observable by applying a function to each item
  • Scan — apply a function to each item emitted by an Observable, sequentially, and emit each successive value
  • Window — periodically subdivide items from an Observable into Observable windows and emit these windows rather than emitting the items one at a time

3- Filtering Observables

Operators that selectively emit items from a source Observable.
  • Debounce — only emit an item from an Observable if a particular timespan has passed without it emitting another item
  • Distinct — suppress duplicate items emitted by an Observable
  • ElementAt — emit only item n emitted by an Observable
  • Filter — emit only those items from an Observable that pass a predicate test
  • First — emit only the first item, or the first item that meets a condition, from an Observable
  • IgnoreElements — do not emit any items from an Observable but mirror its termination notification
  • Last — emit only the last item emitted by an Observable
  • Sample — emit the most recent item emitted by an Observable within periodic time intervals
  • Skip — suppress the first n items emitted by an Observable
  • SkipLast — suppress the last n items emitted by an Observable
  • Take — emit only the first n items emitted by an Observable
  • TakeLast — emit only the last n items emitted by an Observable

4- Combining Observables

Operators that work with multiple source Observables to create a single Observable
  • And/Then/When — combine sets of items emitted by two or more Observables by means of Patternand Plan intermediaries
  • CombineLatest — when an item is emitted by either of two Observables, combine the latest item emitted by each Observable via a specified function and emit items based on the results of this function
  • Join — combine items emitted by two Observables whenever an item from one Observable is emitted during a time window defined according to an item emitted by the other Observable
  • Merge — combine multiple Observables into one by merging their emissions
  • StartWith — emit a specified sequence of items before beginning to emit the items from the source Observable
  • Switch — convert an Observable that emits Observables into a single Observable that emits the items emitted by the most-recently-emitted of those Observables
  • Zip — combine the emissions of multiple Observables together via a specified function and emit single items for each combination based on the results of this function

5- Error Handling Operators

Operators that help to recover from error notifications from an Observable
  • Catch — recover from an onError notification by continuing the sequence without error
  • Retry — if a source Observable sends an onError notification, resubscribe to it in the hopes that it will complete without error

6- Observable Utility Operators

A toolbox of useful Operators for working with Observables
  • Delay — shift the emissions from an Observable forward in time by a particular amount
  • Do — register an action to take upon a variety of Observable lifecycle events
  • Materialize/Dematerialize — represent both the items emitted and the notifications sent as emitted items, or reverse this process
  • ObserveOn — specify the scheduler on which an observer will observe this Observable
  • Serialize — force an Observable to make serialized calls and to be well-behaved
  • Subscribe — operate upon the emissions and notifications from an Observable
  • SubscribeOn — specify the scheduler an Observable should use when it is subscribed to
  • TimeInterval — convert an Observable that emits items into one that emits indications of the amount of time elapsed between those emissions
  • Timeout — mirror the source Observable, but issue an error notification if a particular period of time elapses without any emitted items
  • Timestamp — attach a timestamp to each item emitted by an Observable
  • Using — create a disposable resource that has the same lifespan as the Observable

7- Conditional and Boolean Operators

Operators that evaluate one or more Observables or items emitted by Observables
  • All — determine whether all items emitted by an Observable meet some criteria
  • Amb — given two or more source Observables, emit all of the items from only the first of these Observables to emit an item
  • Contains — determine whether an Observable emits a particular item or not
  • DefaultIfEmpty — emit items from the source Observable, or a default item if the source Observable emits nothing
  • SequenceEqual — determine whether two Observables emit the same sequence of items
  • SkipUntil — discard items emitted by an Observable until a second Observable emits an item
  • SkipWhile — discard items emitted by an Observable until a specified condition becomes false
  • TakeUntil — discard items emitted by an Observable after a second Observable emits an item or terminates
  • TakeWhile — discard items emitted by an Observable after a specified condition becomes false

8- Mathematical and Aggregate Operators

Operators that operate on the entire sequence of items emitted by an Observable
  • Average — calculates the average of numbers emitted by an Observable and emits this average
  • Concat — emit the emissions from two or more Observables without interleaving them
  • Count — count the number of items emitted by the source Observable and emit only this value
  • Max — determine, and emit, the maximum-valued item emitted by an Observable
  • Min — determine, and emit, the minimum-valued item emitted by an Observable
  • Reduce — apply a function to each item emitted by an Observable, sequentially, and emit the final value
  • Sum — calculate the sum of numbers emitted by an Observable and emit this sum

9- Backpressure Operators

  • backpressure operators — strategies for coping with Observables that produce items more rapidly than their observers consume them

10- Connectable Observable Operators

Specialty Observables that have more precisely-controlled subscription dynamics
  • Connect — instruct a connectable Observable to begin emitting items to its subscribers
  • Publish — convert an ordinary Observable into a connectable Observable
  • RefCount — make a Connectable Observable behave like an ordinary Observable
  • Replay — ensure that all observers see the same sequence of emitted items, even if they subscribe after the Observable has begun emitting items

11- Operators to Convert Observables

  • To — convert an Observable into another object or data structure

To read more about http://reactivex.io/


Continue Reading →

Tuesday, 23 October 2018

UI Framework Questions

What is React JS?
ReactJS basically is an open-source JavaScript library which is used for building user interfaces specifically for single page applications. It’s used for handling view layer for web and mobile apps. React also allows us to create reusable UI components.

React allows developers to create large web applications which can change data, without reloading the page. The main purpose of React is to be fast, scalable, and simple. It works only on user interfaces in application. This corresponds to view in the MVC template. It can be used with a combination of other JavaScript libraries or frameworks, such as Angular JS in MVC.

What is Redux
Redux is a predictable state container for JavaScript apps.
Redux makes it easy to manage the state of your application. Another way of looking at this – it helps you manage the data you display and how you respond to user actions.

What is Webpack
Webpack is an open-source JavaScript module bundler. Its main purpose is to bundle JavaScript files for usage in a browser, yet it is also capable of transforming, bundling, or packaging just about any resource or asset. Webpack takes modules with dependencies and generates static assets representing those modules.

What is Babel
Babel is a JavaScript compiler.

Babel is a toolchain that is mainly used to convert ECMAScript 2015+ code into a backwards compatible version of JavaScript in current and older browsers or environments. Here are the main things Babel can do for you:

What is the difference between CSS and SASS?
Sass is a preprocessor for CSS, which makes it essentially the same thing as CSS. Being a preprocessor, you code in Sass and later the code is compiled into CSS. It functions as a (amazing) power-up for CSS, enabling features that are yet to exist in CSS. Sass’ main goal is to improve maintainability as your stylesheets getting larger and more complex. Some handy features Sass provided are:
  1. Variables, you can store reusable values with variables, this can be handy to store values like color hex code or a font stack.
  2. Nesting, you can write hierarchical CSS selectors simpler with Sass, just write it in nests just like what we do with HTML elements.
  3. Partials, you can write your stylesheet in a modular way using partials and import statements, improving your code maintainability and readability.
  4.  Mixins, they are like functions which you can define and reuse throughout your stylesheets. For example, sometimes we have to write one declaration for each rendering engine, like border-radius that should be accompanied by -webkit-border-radius, -moz-border-radius and so on. You can group all those border-radius statements into one mixin and just use the mixin whenever you need to define the border-radius for your element. Neat, isn’t it?
  5. Extension and Inheritance, which lets you share a set of CSS properties across your stylesheets.
  6. Mathematical Operators, like +, -, *, /, and % to aid you in determining various numbers throughout your stylesheets.


Continue Reading →

Select and where in Lamda

Where: Filters a sequence of values based on a predicate.
Select: Projects each element of a sequence into a new form.

//Output: 1,2,3,4,5,6,7,8,9,10
var numbers = Enumerable.Range(110);
          
//Output:  2,4,6,8,10
var even = numbers.Where(n => (n % 2) == 0).ToList();

//Output: false,true,false,true,false,....true
var evens = numbers.Select(n => (n % 2) == 0).ToList();

//Output: 1,2,3,4,5,6,...10
var lineNumbers = numbers.Select(i => i).ToList();


Continue Reading →

Monday, 22 October 2018

MVC and WebApi


  1. Asp.Net MVC is used to create web applications that returns both views and data but Asp.Net Web API is used to create full blown HTTP services with easy and simple way that returns only data not view.
  2. Web API helps to build REST-ful services over the .NET Framework and it also support content-negotiation(it's about deciding the best response format data that could be acceptable by the client. it could be JSON,XML,ATOM or other formatted data), self hosting which are not in MVC.
  3. Web API also takes care of returning data in particular format like JSON,XML or any other based upon the Accept header in the request and you don't worry about that. MVC only return data in JSON format using JsonResult.
  4. In Web API the request are mapped to the actions based on HTTP verbs but in MVC it is mapped to actions name.
  5. Asp.Net Web API is new framework and part of the core ASP.NET framework. The model binding, filters, routing and others MVC features exist in Web API are different from MVC and exists in the new System.Web.Http assembly. In MVC, these featues exist with in System.Web.Mvc. Hence Web API can also be used with Asp.Net and as a stand alone service layer.


Continue Reading →

Topics

ADFS (1) ADO .Net (1) Ajax (1) Angular (47) Angular Js (15) ASP .Net (14) Authentication (4) Azure (3) Breeze.js (1) C# (55) CD (1) CI (2) CloudComputing (2) Coding (10) CQRS (1) CSS (2) Design_Pattern (7) DevOps (4) DI (3) Dotnet (10) DotnetCore (20) Entity Framework (5) ExpressJS (4) Html (4) IIS (1) Javascript (17) Jquery (8) jwtToken (4) Lamda (3) Linq (10) microservice (4) Mongodb (1) MVC (46) NodeJS (8) React (10) SDLC (1) Sql Server (32) SSIS (3) SSO (1) TypeScript (3) UI (1) UnitTest (2) WCF (14) Web Api (16) Web Service (1) XMl (1)

Dotnet Guru Archives