Tuesday, 10 May 2016

Parallel Programming

Introduction To Parallel Programming
Parallel programming is a programming model wherein the execution flow of the application is broken up into pieces that will be done at the same time (concurrently) by multiple cores, processors, or computers for the sake of better performance. Spreading these pieces across them can reduce the overall time needed to complete the work and/or improve the user's experience. However, this is not always the case as there are several pitfalls you need to be aware of and we will certainly discuss them through the series.

Difference between asynchronous and parallel programming?
  1. When you run something asynchronously it means it is non-blocking, you execute it without waiting for it to complete and carry on with other things.
  2. Parallelism means to run multiple things at the same time, in parallel. Parallelism works well when you can separate tasks into independent pieces of work.
Asynchonous programming solves the problem of waiting around for an expensive operation to complete
before you can do anything else. If you can get other stuff done while you're waiting for the operation to
complete then that's a good thing. Example: keeping a UI running while you go and retrieve more data
from a web service. Parallel programming is related but is more concerned with breaking a large task into smaller chunks that
can be computed at the same time. The results of the smaller chunks can then be combined to produce the
overall result.

Task Class

Task class Represents an asynchronous operation.

A Simple Example is below:

using System.Threading.Tasks;

class Program
    {
     static void Main(string[] args)
        {
            var arrTask = new List<Task>();
            Task taskShowDate = Task.Run(() =>
            {
                ShowDate();
            });
            arrTask.Add(taskShowDate);

            Task taskShowTime = Task.Run(() =>
            {
                ShowTime();
            });
            arrTask.Add(taskShowTime);

            Task.WaitAll(arrTask.ToArray(), 10000000);
            //Parallel.Invoke(ShowDate, ShowTime);
            Console.ReadLine();
        }
        public static void ShowDate()
        {
            Console.WriteLine(DateTime.Now.ToLongDateString());
        }

        public static void ShowTime()
        {
            Console.WriteLine(DateTime.Now.ToLocalTime());
        }
  }

Task.WaitAll(): Waits for all of the provided Task objects to complete execution.

Why we need Tasks

It can be used whenever you want to execute something in parallel. Asynchronous implementation is easy in a task, using’ async’ and ‘await’ keywords.


here is another important link Introducing-task-programming
Continue Reading →

Wednesday, 27 April 2016

Creating a Custom Tooltip

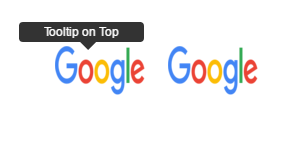
Creating a Custom Tooltip using Htm and CSS

      ToolTip on the Top

To create a tooltip on the top of a content you need to write the below styles and Html.

table{
margin:10%
}
table tr td{
padding-right:20px;
}
    a.tooltips {
        position: relative;
        display: inline;
    }

        a.tooltips span.tips {
            position: absolute;
             width: 125px;
            max-width: 200px;
            color: #FFFFFF;
            background: #000000;
            height: 20px;
            line-height: 20px;
            text-align: center;
            visibility: hidden;
            border-radius: 4px;
            font-size: 12px;
            font-family: "Helvetica Neue",Helvetica,Arial,sans-serif;
            margin-left: -45px !important;
        }

            a.tooltips span.tips:after {
                content: '';
                position: absolute;
                bottom: 100%;
                left: 55%;
                margin-left: -8px;
                width: 0;
                height: 0;
                top: 20px;
                border-top: 8px solid #000000;
                border-right: 8px solid transparent;
                border-left: 8px solid transparent;
            }

    a:hover.tooltips span.tips {
        visibility: visible;
        opacity: 0.8;
        top: -60px;
        left: 10%;
        margin-left: -76px;
        z-index: 999;
    }

Add the Html

<table>
<tr>
<td>
<a class="tooltips">
       <img src="https://www.google.co.in/images/branding/googlelogo/1x/googlelogo_color_272x92dp.png" height="50" width="90">
  <span class="tips">Tooltip on Top</span>
</a>
</td>
</tr>
</table>

Now Run your Html Page:

           ToolTip on the Bottom

To create a tooltip on the bottom of a content you need to write the below styles and Html.

     span.tooltips {
        position: relative;
        display: inline;
    }

        span.tooltips span {
            position: absolute;
          width: 125px;
            color: #FFFFFF;
            background: #000000;
            height: 20px;
            line-height: 20px;
            text-align: center;
            visibility: hidden;
            border-radius: 4px;
            font-size: 12px;
            font-family: "Helvetica Neue",Helvetica,Arial,sans-serif;
            margin-left: -45px !important;
            font-weight:normal !important;
        }

            span.tooltips span:after {
                content: '';
                position: absolute;
                bottom: 100%;
                left: 55%;
                margin-left: -8px;
                width: 0;
                height: 0;
                border-bottom: 8px solid #000000;
                border-right: 8px solid transparent;
                border-left: 8px solid transparent;
            }

    span:hover.tooltips span {
        visibility: visible;
        opacity: 0.8;
        top: 25px;
        left: 18%;
        margin-left: -76px;
        z-index: 999;
    }

  Add the Html

<table>
<tr>
<td>
<span class="tooltips" style="font-size: 13px;">
<img src="https://www.google.co.in/images/branding/googlelogo/1x/googlelogo_color_272x92dp.png" height="50" width="90">
  <span class="tips">Tooltip on Bottom</span>
 </span>
</td>
</tr>
</table>

Now Run your Html Page:


Click here to Download the Html File.


Continue Reading →

Tuesday, 26 April 2016

AngularJS Services

AngularJS Services

In AngularJS you can make your own service, or use one of the many built-in services.

What is a Service?

In AngularJS, a service is a function, or object, that is available for, and limited to, your AngularJS application.

AngularJS has about 30 built-in services. One of them is the $location service.
The $location service has methods which return information about the location of the current web page:

Example
Use the $location service in a controller:
var app = angular.module('myApp', []);
app.controller('customersCtrl', function ($scope, $location) {
    $scope.myUrl = $location.absUrl();
});


Note that the $location service is passed in to the controller as an argument. In order to use the service in the controller, it must be defined as a dependency.

Why use Services?

For many services, like the $location service, it seems like you could use objects that are already in the DOM, like the window.location object, and you could, but it would have some limitations, at least for your AngularJS application.

AngularJS constantly supervises your application, and for it to handle changes and events properly, AngularJS prefers that you use the $location service instead of the window.location object.

The $http Service

The $http service is one of the most common used services in AngularJS applications. The service makes a request to the server, and lets your application handle the response.

Example
Use the $http service to request data from the server:

var app = angular.module('myApp', []);
app.controller('myCtrl', function ($scope, $http) {
    $http.get("welcome.htm").then(function (response) {
        $scope.myWelcome = response.data;
    });
});


The $timeout Service

The $timeout service is AngularJS' version of the window.setTimeout function.

Example
Display a new message after two seconds:

var app = angular.module('myApp', []);
app.controller('myCtrl', function ($scope, $timeout) {
    $scope.myHeader = "Hello World!";
    $timeout(function () {
        $scope.myHeader = "How are you today?";
    }, 2000);
});


The $interval Service

The $interval service is AngularJS' version of the window.setInterval function.

Example
Display the time every second:

var app = angular.module('myApp', []);
app.controller('myCtrl', function ($scope, $interval) {
    $scope.theTime = new Date().toLocaleTimeString();
    $interval(function () {
        $scope.theTime = new Date().toLocaleTimeString();
    }, 1000);
});


Create Your Own Service

To create your own service, connect your service to the module:
Create a service named hexafy:

app.service('hexafy', function () {
    this.myFunc = function (x) {
        return x.toString(16);
    }
});

To use your custom made service, add it as a dependency when defining the filter:

Example
Use the custom made service named hexafy to convert a number into a hexadecimal number:

app.controller('myCtrl', function ($scope, hexafy) {
    $scope.hex = hexafy.myFunc(255);
});


Use a Custom Service Inside a Filter

Once you have created a service, and connected it to your application, you can use the service in any controller, directive, filter, or even inside other services.
To use the service inside a filter, add it as a dependency when defining the filter:
The service hexafy used in the filter myFormat:

app.filter('myFormat', ['hexafy', function (hexafy) {
    return function (x) {
        return hexafy.myFunc(x);
    };
}]);


You can use the filter when displaying values from an object, or an array:
Create a service named hexafy:

<ul>
    <li ng-repeat="x in counts">{{x | myFormat}}</li>
</ul>

Reference From: http://www.w3schools.com/


Continue Reading →

Topics

ADFS (1) ADO .Net (1) Ajax (1) Angular (47) Angular Js (15) ASP .Net (14) Authentication (4) Azure (3) Breeze.js (1) C# (55) CD (1) CI (2) CloudComputing (2) Coding (10) CQRS (1) CSS (2) Design_Pattern (7) DevOps (4) DI (3) Dotnet (10) DotnetCore (20) Entity Framework (5) ExpressJS (4) Html (4) IIS (1) Javascript (17) Jquery (8) jwtToken (4) Lamda (3) Linq (10) microservice (4) Mongodb (1) MVC (46) NodeJS (8) React (10) SDLC (1) Sql Server (32) SSIS (3) SSO (1) TypeScript (3) UI (1) UnitTest (2) WCF (14) Web Api (16) Web Service (1) XMl (1)

Dotnet Guru Archives