Wednesday, 27 April 2016

Creating a Custom Tooltip

Creating a Custom Tooltip using Htm and CSS

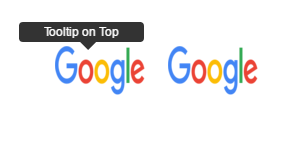
      ToolTip on the Top

To create a tooltip on the top of a content you need to write the below styles and Html.

table{
margin:10%
}
table tr td{
padding-right:20px;
}
    a.tooltips {
        position: relative;
        display: inline;
    }

        a.tooltips span.tips {
            position: absolute;
             width: 125px;
            max-width: 200px;
            color: #FFFFFF;
            background: #000000;
            height: 20px;
            line-height: 20px;
            text-align: center;
            visibility: hidden;
            border-radius: 4px;
            font-size: 12px;
            font-family: "Helvetica Neue",Helvetica,Arial,sans-serif;
            margin-left: -45px !important;
        }

            a.tooltips span.tips:after {
                content: '';
                position: absolute;
                bottom: 100%;
                left: 55%;
                margin-left: -8px;
                width: 0;
                height: 0;
                top: 20px;
                border-top: 8px solid #000000;
                border-right: 8px solid transparent;
                border-left: 8px solid transparent;
            }

    a:hover.tooltips span.tips {
        visibility: visible;
        opacity: 0.8;
        top: -60px;
        left: 10%;
        margin-left: -76px;
        z-index: 999;
    }

Add the Html

<table>
<tr>
<td>
<a class="tooltips">
       <img src="https://www.google.co.in/images/branding/googlelogo/1x/googlelogo_color_272x92dp.png" height="50" width="90">
  <span class="tips">Tooltip on Top</span>
</a>
</td>
</tr>
</table>

Now Run your Html Page:

           ToolTip on the Bottom

To create a tooltip on the bottom of a content you need to write the below styles and Html.

     span.tooltips {
        position: relative;
        display: inline;
    }

        span.tooltips span {
            position: absolute;
          width: 125px;
            color: #FFFFFF;
            background: #000000;
            height: 20px;
            line-height: 20px;
            text-align: center;
            visibility: hidden;
            border-radius: 4px;
            font-size: 12px;
            font-family: "Helvetica Neue",Helvetica,Arial,sans-serif;
            margin-left: -45px !important;
            font-weight:normal !important;
        }

            span.tooltips span:after {
                content: '';
                position: absolute;
                bottom: 100%;
                left: 55%;
                margin-left: -8px;
                width: 0;
                height: 0;
                border-bottom: 8px solid #000000;
                border-right: 8px solid transparent;
                border-left: 8px solid transparent;
            }

    span:hover.tooltips span {
        visibility: visible;
        opacity: 0.8;
        top: 25px;
        left: 18%;
        margin-left: -76px;
        z-index: 999;
    }

  Add the Html

<table>
<tr>
<td>
<span class="tooltips" style="font-size: 13px;">
<img src="https://www.google.co.in/images/branding/googlelogo/1x/googlelogo_color_272x92dp.png" height="50" width="90">
  <span class="tips">Tooltip on Bottom</span>
 </span>
</td>
</tr>
</table>

Now Run your Html Page:


Click here to Download the Html File.


Continue Reading →

Tuesday, 26 April 2016

AngularJS Services

AngularJS Services

In AngularJS you can make your own service, or use one of the many built-in services.

What is a Service?

In AngularJS, a service is a function, or object, that is available for, and limited to, your AngularJS application.

AngularJS has about 30 built-in services. One of them is the $location service.
The $location service has methods which return information about the location of the current web page:

Example
Use the $location service in a controller:
var app = angular.module('myApp', []);
app.controller('customersCtrl', function ($scope, $location) {
    $scope.myUrl = $location.absUrl();
});


Note that the $location service is passed in to the controller as an argument. In order to use the service in the controller, it must be defined as a dependency.

Why use Services?

For many services, like the $location service, it seems like you could use objects that are already in the DOM, like the window.location object, and you could, but it would have some limitations, at least for your AngularJS application.

AngularJS constantly supervises your application, and for it to handle changes and events properly, AngularJS prefers that you use the $location service instead of the window.location object.

The $http Service

The $http service is one of the most common used services in AngularJS applications. The service makes a request to the server, and lets your application handle the response.

Example
Use the $http service to request data from the server:

var app = angular.module('myApp', []);
app.controller('myCtrl', function ($scope, $http) {
    $http.get("welcome.htm").then(function (response) {
        $scope.myWelcome = response.data;
    });
});


The $timeout Service

The $timeout service is AngularJS' version of the window.setTimeout function.

Example
Display a new message after two seconds:

var app = angular.module('myApp', []);
app.controller('myCtrl', function ($scope, $timeout) {
    $scope.myHeader = "Hello World!";
    $timeout(function () {
        $scope.myHeader = "How are you today?";
    }, 2000);
});


The $interval Service

The $interval service is AngularJS' version of the window.setInterval function.

Example
Display the time every second:

var app = angular.module('myApp', []);
app.controller('myCtrl', function ($scope, $interval) {
    $scope.theTime = new Date().toLocaleTimeString();
    $interval(function () {
        $scope.theTime = new Date().toLocaleTimeString();
    }, 1000);
});


Create Your Own Service

To create your own service, connect your service to the module:
Create a service named hexafy:

app.service('hexafy', function () {
    this.myFunc = function (x) {
        return x.toString(16);
    }
});

To use your custom made service, add it as a dependency when defining the filter:

Example
Use the custom made service named hexafy to convert a number into a hexadecimal number:

app.controller('myCtrl', function ($scope, hexafy) {
    $scope.hex = hexafy.myFunc(255);
});


Use a Custom Service Inside a Filter

Once you have created a service, and connected it to your application, you can use the service in any controller, directive, filter, or even inside other services.
To use the service inside a filter, add it as a dependency when defining the filter:
The service hexafy used in the filter myFormat:

app.filter('myFormat', ['hexafy', function (hexafy) {
    return function (x) {
        return hexafy.myFunc(x);
    };
}]);


You can use the filter when displaying values from an object, or an array:
Create a service named hexafy:

<ul>
    <li ng-repeat="x in counts">{{x | myFormat}}</li>
</ul>

Reference From: http://www.w3schools.com/


Continue Reading →

Topics

ADFS (1) ADO .Net (1) Ajax (1) Angular (47) Angular Js (15) ASP .Net (14) Authentication (4) Azure (3) Breeze.js (1) C# (49) CD (1) CI (2) CloudComputing (2) Coding (8) CQRS (1) CSS (2) Design_Pattern (7) DevOps (4) DI (3) Dotnet (10) DotnetCore (19) Entity Framework (4) ExpressJS (4) Html (4) IIS (1) Javascript (17) Jquery (8) Lamda (3) Linq (10) microservice (4) Mongodb (1) MVC (46) NodeJS (8) React (10) SDLC (1) Sql Server (32) SSIS (3) SSO (1) TypeScript (3) UI (1) UnitTest (2) WCF (14) Web Api (16) Web Service (1) XMl (1)

Dotnet Guru Archives